

How to Choose the Right Muslin Studio Backdrop for Your Photography Style
May 2, 2026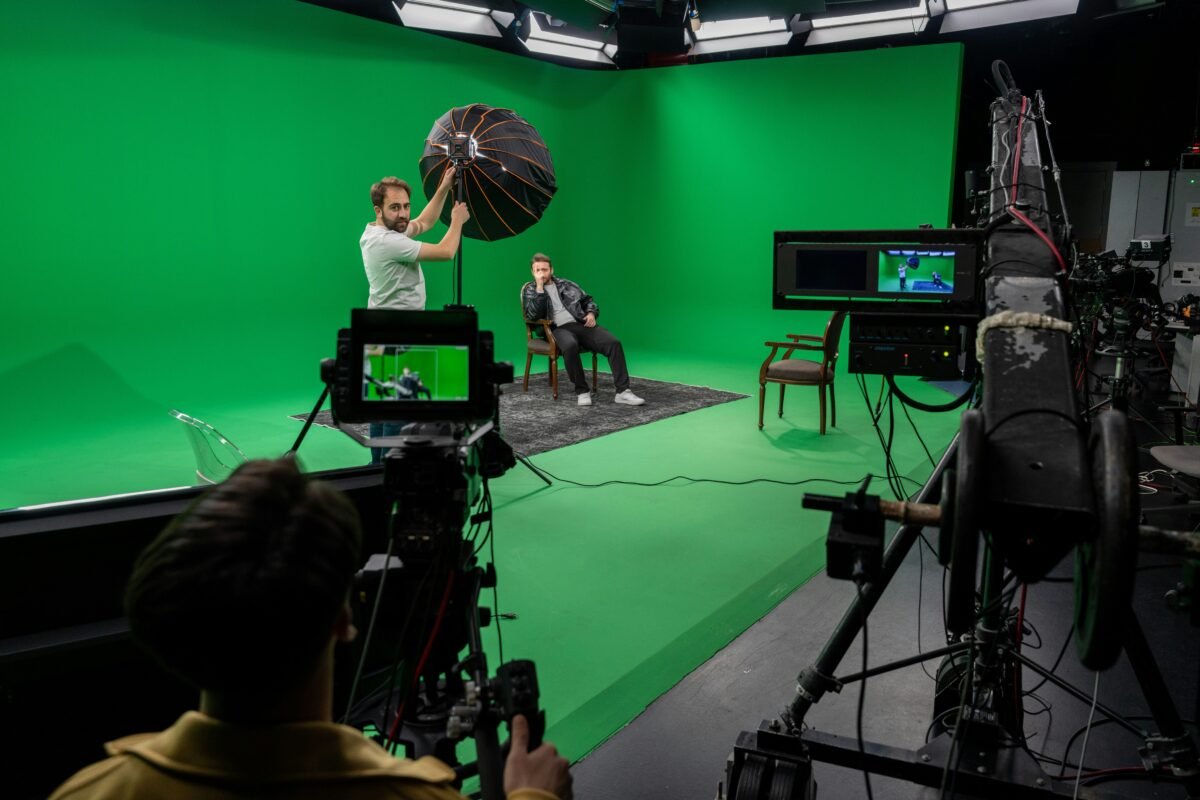
The art of the perfect finish on every flawless backdrop.
Introduction
Green screen gets a bad reputation in photography circles sometimes. Photographers who have never worked with a properly set-up chromakey system think of it as a shortcut — something film studios use when they cannot build a real set, or something budget school photographers use to paste kids in front of clip-art backgrounds.
That is not what professional chromakey photography looks like. Not even close.
Done right — with the correct backdrop, proper lighting, and solid technique — chromakey gives you an almost limitless creative freedom. You can place your subject in a Manhattan penthouse, on a sun-bleached Italian coastline, in a fantasy landscape, or against a perfectly clean branded corporate background without ever leaving your studio. And your client, looking at the finished image, will not see a composite. They will just see a great photograph.
Done wrong — with a cheap synthetic backdrop, uneven lighting, and a rushed key — you get exactly the bad-reputation version. Hard edges. Color spill. Patchy artifacts around fine details like hair and loose fabric. The kind of result that announces itself as fake before the viewer even consciously registers why.
The difference between these two outcomes is not primarily about the sophistication of your keying software or how many hours you spend in post-processing. The difference starts with the physical setup — and most critically, with the quality of the chromakey photography backdrop you are working with.
This guide covers all of it. We will explain the science behind how chromakey actually works, walk through the specific properties that make a professional-grade chromakey backdrop essential for quality results, break down the lighting setup requirements step by step, and give you a practical framework for getting real professional composite work out of your chromakey studio — whether you are building a new setup from scratch or troubleshooting problems with an existing one.
The Science Behind Chromakey — Why Color Uniformity Is Everything
Before you can fully understand why backdrop quality matters so much for chromakey work, it helps to understand what keying software is actually doing when it removes a background.
The process works by isolating a specific color range in the image and removing every pixel that falls within that range, leaving those pixels transparent. The underlying principle sounds simple — just remove all the green or blue pixels — but the execution is considerably more nuanced than that.
Real-world images do not have perfectly uniform green pixels across the entire backdrop area. Light falls differently at different points across the background. Shadows and highlights shift the perceived green value of the backdrop surface. Camera sensors capture color with some inherent natural variation. The backdrop material itself reflects and absorbs light differently depending on its surface characteristics.
The job of the keying software is to define a color range that captures all of these variations in the backdrop while leaving the subject’s colors completely intact. The wider the variation in the backdrop’s color values, the wider that range needs to be set. And the wider the range, the more likely you are to clip fine details at the edge of the subject, lose delicate semi-transparent areas like hair and loose fabric, and introduce artifacts in zones where the subject’s clothing or skin tone comes close to the backdrop’s color range.
This is exactly why backdrop uniformity matters so much. A chromakey backdrop that delivers consistent, tight color values across its entire surface gives your keying software the best possible raw material to work with. It keeps the sampling range narrow, which means cleaner edges, better retention of fine detail, and far less manual cleanup work in post.
A backdrop that shifts color values across its surface — because of uneven dye application, synthetic material that reflects light unpredictably, or hot spots from the backdrop’s own sheen — forces you to expand your keying range to catch everything. That degrades the quality of your edge work considerably, and there is no amount of post-processing skill that can fully compensate for it.
That is the fundamental case for investing in a professional-grade muslin chromakey photography backdrop rather than the cheapest green screen you can find.
Green vs. Blue — Which Chroma Color Should You Choose?
This question comes up constantly, and the honest answer is that it depends on your specific shooting situation. Here is a clear breakdown.
Why Green Is the Default Choice for Most Photographers
Green has become the dominant chroma color in photography and film production for a practical reason that has nothing to do with preference: digital camera sensors are more sensitive to green than to any other color. This is a direct result of how digital image sensors are designed. A standard Bayer pattern sensor has twice as many green photosites as red or blue, because green corresponds most closely to human luminance perception and carries more of the detail information in a captured image.
That higher sensitivity to green means a green backdrop produces a cleaner, more detailed signal in your camera — less grain, less noise, and more raw color information for keying software to work with. In practical terms, this translates to cleaner keys with better edge detail and fewer artifact problems.
Green is also generally a better choice when your subjects are wearing typical everyday clothing colors. Most wardrobe colors are well separated from green, which reduces the risk of accidentally keying out elements of the subject along with the background.
The limitation of green: It does not work when your subject is wearing green or has significant green elements in their clothing, accessories, or props. This is more common than you might expect — military uniforms, outdoor gear, many natural fabric tones, and seasonal clothing can all create problems against a green screen.
When Blue Is the Better Option
Blue screen is the older of the two chroma technologies — it was the standard for decades in film production before digital cameras shifted the industry toward green. It remains the right choice in several specific situations.
When your subject is wearing green or any color that is problematic against a green screen, switching to a blue backdrop is the obvious and immediate solution. Blue also tends to perform better when you are working near natural light sources — daylight has a strong green component, which can create spill issues on a green screen when shooting near windows or outdoors. A blue backdrop often responds more cleanly in those natural-light setups.
There is also a meaningful practical advantage to blue in certain skin tone situations. Some olive and darker skin tones contain enough green-adjacent coloration that aggressive green screen keying can occasionally introduce subtle color shifts or transparency artifacts around skin edges. Blue tends to produce cleaner results in those cases.
The limitation of blue: Blue appears far more commonly in everyday clothing than green does. Denim, navy suits, corporate blue shirts, casual blue dresses — blue shows up constantly in subject wardrobe. Always check your subject’s clothing against your backdrop color before you start shooting.
The Practical Answer
Most professional chromakey studios that do high-volume composite work maintain both a green and a blue backdrop and choose based on what the subject is wearing on any given day. If you are just starting out and need to make one choice, green is the right default for most shooting situations.
What Makes an Aavant Chromakey Backdrop Different
Here is a specific look at why the backdrop you choose has such a direct impact on the quality of your composite work — and what to look for in a professional-grade chromakey photography backdrop.
Fabric Matters More Than You Think
The single most impactful variable in chromakey backdrop quality — more than brand, more than price, more than anything else printed in the product description — is the fabric.
Synthetic fabrics — polyester, nylon, polypropylene — are the default choice for cheap green screens because they are inexpensive to produce and easy to print or dye to a consistent color in controlled factory conditions. The problem is that synthetic fabrics reflect light. They have a slight sheen that creates specular highlights across the surface — points where the backdrop catches studio lights and reflects them back at a slightly different color value than the surrounding material. Under studio lighting, a synthetic green screen typically shows visible hot spots, and those hot spots create color value variation that directly degrades the quality of your key.
Premium 100% cotton muslin — the material Aavant uses for all of our chromakey photography backdrops — behaves very differently. Cotton is a matte, light-absorbing fabric. It does not reflect light specularly. It absorbs your studio lighting and produces a soft, even diffuse reflection that gives you consistent color values across the entire surface. That consistency is exactly what chromakey software is designed to work with, and it is what separates a clean, effortless key from a frustrating, time-consuming one.
Our chromakey backdrops are woven from 165 GSM premium cotton muslin — the same material and weight standard that defines our full professional backdrop range. The chromakey color is applied through a precision dye process that achieves broadcast-standard color values with consistency maintained across the entire surface area. We test color uniformity as a standard part of our quality control process. If a backdrop shows significant color variation, it does not leave our facility.
Weight and Natural Drape
A backdrop that does not hang flat creates physical wrinkles and folds that cast shadows and introduce additional tonal variation across the background surface. This is a more serious problem than it sounds — every fold shadow creates a zone where the backdrop’s color value is shifted by the shadow depth, and that shifting color value adds real complexity to your keying challenge.
165 GSM cotton muslin has enough weight and structural integrity to hang flat naturally under its own gravity, which minimizes the fold and wrinkle problem significantly compared to lighter synthetic alternatives. For critical commercial work, you can further minimize wrinkles by steaming the backdrop before a shoot. Cotton muslin responds beautifully to steaming in a way that synthetic fabrics do not.
Flame Retardancy
All Aavant chromakey backdrops are treated with international-standard flame retardants as a standard feature. This matters for commercial studio compliance, broadcast facility requirements, and any setting where fire safety regulations apply to on-set materials. If you work in a broadcast facility, a commercial production space, or any venue with applicable safety requirements, always verify that your backdrop is correctly treated and certified before you use it.
Setting Up Your Chromakey Studio — The Lighting Framework
Here is where a lot of photographers who are new to chromakey work run into trouble. They buy a decent backdrop, set up their regular portrait lighting, and then wonder why their key is coming out messy. The issue, almost every time, is lighting — specifically that they have not separated their backdrop lighting from their subject lighting.
Proper chromakey studio lighting has two completely independent tasks: lighting the backdrop and lighting the subject. These two tasks actively work against each other if you try to handle them with the same lights. Getting both right requires separate consideration of each, with independent control over each set of lights.
Lighting the Backdrop
Your chromakey backdrop needs to be lit evenly — consistently across its entire surface, from edge to edge, top to bottom. The goal is to eliminate any significant variation in the brightness of the backdrop so that its color value is as consistent as possible throughout the entire frame.
To achieve this, you need to light the backdrop separately from your subject, using lights that are positioned to provide even coverage of the backdrop’s surface. The standard approach is two lights positioned at 45-degree angles to the backdrop surface, at a height slightly above the center of the backdrop, aimed back across the surface toward the center. Both lights should be at equal power output and positioned at equal distances from the backdrop center, so that the coverage from each side overlaps evenly in the middle.
The intensity of your backdrop lighting should produce an exposure on the backdrop that is approximately equal to the exposure on your subject — within about half a stop either way. If the backdrop is significantly underexposed relative to your subject, you will get dark, shadow-contaminated color values that are difficult to key cleanly. If it is significantly overexposed, you will get washed-out color values that bleed toward white and also key unevenly.
Use a color meter or shoot a quick test frame and check your backdrop exposure independently of your subject exposure. This small extra step saves an enormous amount of post-processing frustration on every shoot.
Separating Subject from Backdrop
One of the most common technical mistakes in chromakey setups is placing the subject too close to the backdrop surface. When your subject is close to the backdrop, two problems emerge at the same time. Their body casts a shadow on the backdrop, creating dark zones that key unevenly. And the green or blue light from the illuminated backdrop reflects off their clothing, skin, and any semi-transparent areas — this is called color spill, and it is one of the biggest enemies of a clean composite result.
The solution is distance. Move your subject as far forward from the backdrop as your studio space allows. The minimum working distance for practical professional results is generally around 6 to 8 feet between the subject and the backdrop surface. More distance is always better. With adequate separation, backdrop shadows fall below and behind the subject rather than onto the backdrop surface itself, and light spill from the backdrop does not have the angle or intensity to significantly contaminate the subject.
Managing Color Spill on the Subject
Even with good subject-to-backdrop distance, you will often see some degree of color spill — the green or blue light from the illuminated backdrop wrapping around the edges of the subject and introducing a colored fringe. Some spill is nearly inevitable in a properly lit chromakey setup. The question is how to minimize it and handle what remains.
A practical physical control for spill is to position a white or silver reflector on the opposite side of the subject from the backdrop, angled to bounce a soft, warm fill light back toward the subject’s edges. This partially counteracts the cool-colored spill from the backdrop by introducing opposing light at the edges of the subject.
In post-processing, virtually every professional keying tool includes a spill suppression function. Look for “spill removal,” “spill correction,” or “edge color correction” in your software. Use it consistently. Even a subtle spill suppression pass will clean up edge fringing significantly and produce a much more natural-looking composite edge.
Recommended Lighting Setup
- Two background lights — at 45-degree angles to the backdrop, equal power, producing even edge-to-edge coverage
- Key light — primary subject illumination, positioned for your chosen portrait aesthetic
- Fill light or reflector — to control the subject’s shadow ratio and optionally counteract spill
- Hair or rim light (optional) — to separate the subject from the background, particularly useful for dark hair against a brighter backdrop
The subject lights and backdrop lights should be on separate power circuits or independently controllable so you can adjust each side without affecting the other.
Camera Settings for the Best Key
Once your lighting is dialed in, a few camera-side adjustments will make your keying results significantly better.
Shoot at the lowest ISO your light levels allow. Digital noise adds color variation to your backdrop area, which widens the color range you need to key and can introduce subtle grain artifacts around your subject’s edges in the finished composite. Keep your ISO as low as your setup permits — ISO 100 to 400 is the ideal working range for controlled studio chromakey work.
Use a medium aperture. Extreme shallow depth of field — wide open at f/1.4 or f/1.8 — will blur the backdrop, which sounds helpful but actually makes keying harder. Bokeh introduces gradual tonal transitions at the edges that are genuinely difficult to key cleanly. An aperture in the f/5.6 to f/8 range keeps the backdrop reasonably sharp and your keying edges crisp and well-defined.
Shoot in RAW. RAW files give your editing software more color data to work with when sampling the backdrop color, which produces a more accurate initial key. JPEG compression introduces color artifacts that can complicate the keying process, particularly around subject edges.
Avoid motion blur. Any motion blur on the subject creates semi-transparent edge zones in the image — partial-value pixels that contain both subject color and backdrop color blended together. These are the hardest zones to key cleanly. For still photography, keep your shutter speed high enough to eliminate any blur from natural subject movement during the frame.
Common Chromakey Problems and How to Fix Them
Even experienced photographers run into chromakey challenges from time to time. Here are the most common problems and their practical solutions.
Problem: Patchy, inconsistent keying across the backdrop area Cause: Uneven backdrop lighting — some areas brighter or darker than others, creating variation in the backdrop’s color value across the frame. Fix: Check your backdrop lighting setup for even coverage. A good diagnostic approach is to shoot a test frame with the subject removed entirely and examine the backdrop’s histogram. It should show a single, tight, clean peak for the chroma color. Any spreading of that peak indicates lighting inconsistency that needs to be corrected.
Problem: Green or blue fringing around the subject’s edges Cause: Color spill from the backdrop lighting wrapping around the subject. Fix: Increase the subject-to-backdrop distance. Add opposing fill light at the subject’s edges. Apply spill suppression in post-processing as part of your standard keying workflow.
Problem: Fine hair detail keying out along with the backdrop Cause: Backdrop color value too similar to the hair tone in shadow areas, or the keying range set too wide to compensate for backdrop inconsistency. Fix: Improve backdrop lighting evenness. Use a slightly longer lens to reduce backdrop depth-of-field issues. Use dedicated hair masking or edge refinement tools in your keying software — most professional tools have refinement controls specifically built for fine detail retention.
Problem: Subject’s clothing partially keying out Cause: The subject is wearing a color too close to the chroma color of the backdrop. Fix: Switch to the alternative chroma color — from green to blue or vice versa. Always check subject wardrobe against your chroma color before the session begins. This is a five-second step that can save your entire shoot.
Problem: Shadow from the subject falling on the backdrop Cause: Subject positioned too close to the backdrop surface. Fix: Move the subject further from the backdrop. Increase backdrop lighting intensity slightly to lift the shadow areas. As a general rule, always maximize the distance between subject and backdrop whenever your studio space allows.
Chromakey for Video vs. Still Photography — Key Differences
The fundamentals of chromakey are the same whether you are shooting stills or video, but there are meaningful differences in how you approach the setup and the keying workflow for each.
For still photography, the primary challenges are getting a clean single-frame key with well-preserved edge detail. You have the luxury of working on one image at a time, which means you can do detailed, frame-specific refinement when needed. The Aavant chromakey backdrop’s color consistency is the most important factor for still work — an even, uniform surface means consistent color sampling across the entire frame.
For video production, the demands are more complex because you are effectively keying hundreds or thousands of frames, and any inconsistency in the backdrop — or in how the subject moves relative to the lighting — will create visible flickering or edge variation in the keyed footage. Here, the quality of the backdrop matters even more, because you are relying on consistent color performance across the full duration of the recording rather than a single moment. Movement also introduces new challenges — a subject moving quickly toward or away from the backdrop will have slightly different spill characteristics at different points in that movement, and the keying process needs to handle that variation smoothly and invisibly.
For serious video production work, a dedicated chromakey lighting setup with carefully controlled and measured light levels is genuinely essential. Many professional video production setups use light meters to verify backdrop exposure at multiple points across the surface before beginning any recording, to ensure the maximum possible frame-to-frame consistency.
Building Your Chromakey Setup — A Practical Starting Point
If you are putting together a chromakey studio from scratch, here is a practical starting point that will deliver professional-quality results for most photography and videography applications.
Backdrop: Aavant Chromakey Solid — available in broadcast-standard green and chroma blue. Professional 165 GSM cotton muslin. For typical single-subject portrait or video work, a 10 × 12 foot backdrop is a solid starting point. If you are shooting full-body or multiple subjects, go larger to give yourself the room you need.
Backdrop support: A sturdy backdrop stand system with a horizontal crossbar and spring-loaded end clamps. The crossbar needs to span your backdrop without significant sag in the center — consider a support center stand for wider setups.
Backdrop lights: Two continuous light sources or monoblock strobes positioned at 45 degrees to the backdrop, at equal distance and power. Softboxes help reduce hot spots. For video work, continuous LED panels with high CRI ratings are the practical choice over strobes.
Subject lights: Your regular portrait or video lighting kit. A basic three-light setup — key, fill, and rim or hair light — is sufficient for most composite work.
Camera: Any current professional mirrorless or DSLR body with RAW shooting capability.
Software: For still photography — Adobe Photoshop’s Select Subject and Refine Edge tools, or dedicated masking tools. For video — DaVinci Resolve Fusion (built in, completely free), Adobe After Effects with the Keylight plug-in, or Blackmagic’s dedicated Ultra Keyer for broadcast-level work.
The Bottom Line on Chromakey Backdrop Quality
We want to be direct about this, because it is something photographers learn through hard experience more often than they hear it upfront: the backdrop is the foundation of your entire chromakey system. Not the software. Not the lights. The backdrop.
A professional-grade chromakey photography backdrop that delivers broadcast-standard color uniformity across its entire surface — like Aavant’s chromakey muslin range — gives every other component of your system the best possible raw material to work with. It means your keying software does not have to work as hard. It means your post-processing time drops significantly on every single shoot. It means your composite edges are cleaner, your fine detail retention is better, and your finished images look like polished professional work rather than obvious post-production efforts.
A cheap, inconsistent backdrop does not just save you money. It costs you time, image quality, and client confidence — and it makes every other part of your setup work harder than it needs to, on every shoot, indefinitely.
We have been producing professional chromakey photography backdrops for decades. Our color standards and quality control processes are among the best in the industry, and the photographers and video producers who work with our chromakey range consistently stay with it — because once you have shot against a backdrop where the color is truly consistent and the keying simply works, there is no reason to settle for anything less.
If you have questions about our chromakey range — sizing, specific color values, setup recommendations, or anything at all — reach out to our team at aavant@aavant.co.in. We are always happy to talk through your setup and make sure you are getting exactly what you need.
Browse the full Aavant Chromakey Solids range at aavant.co.in.